Follow Keri skirt to make this dress (and make adjustments as followed)
And increase just as often but with twice as many stitches and use treble crochet instead of hdc. Skip the waist elastic part as you don’t need extra rows to be folded around the elastic as you crochet on the opposite side of the row for the top part.
You start with a chainless foundation with treble stitch.


Before getting started:
Hook: 3 mm
Yarn: Superfine/fingering. 50 g = 160 m and/or sport/fine 50 g = 140 m. Choose the colors you like, or one color.
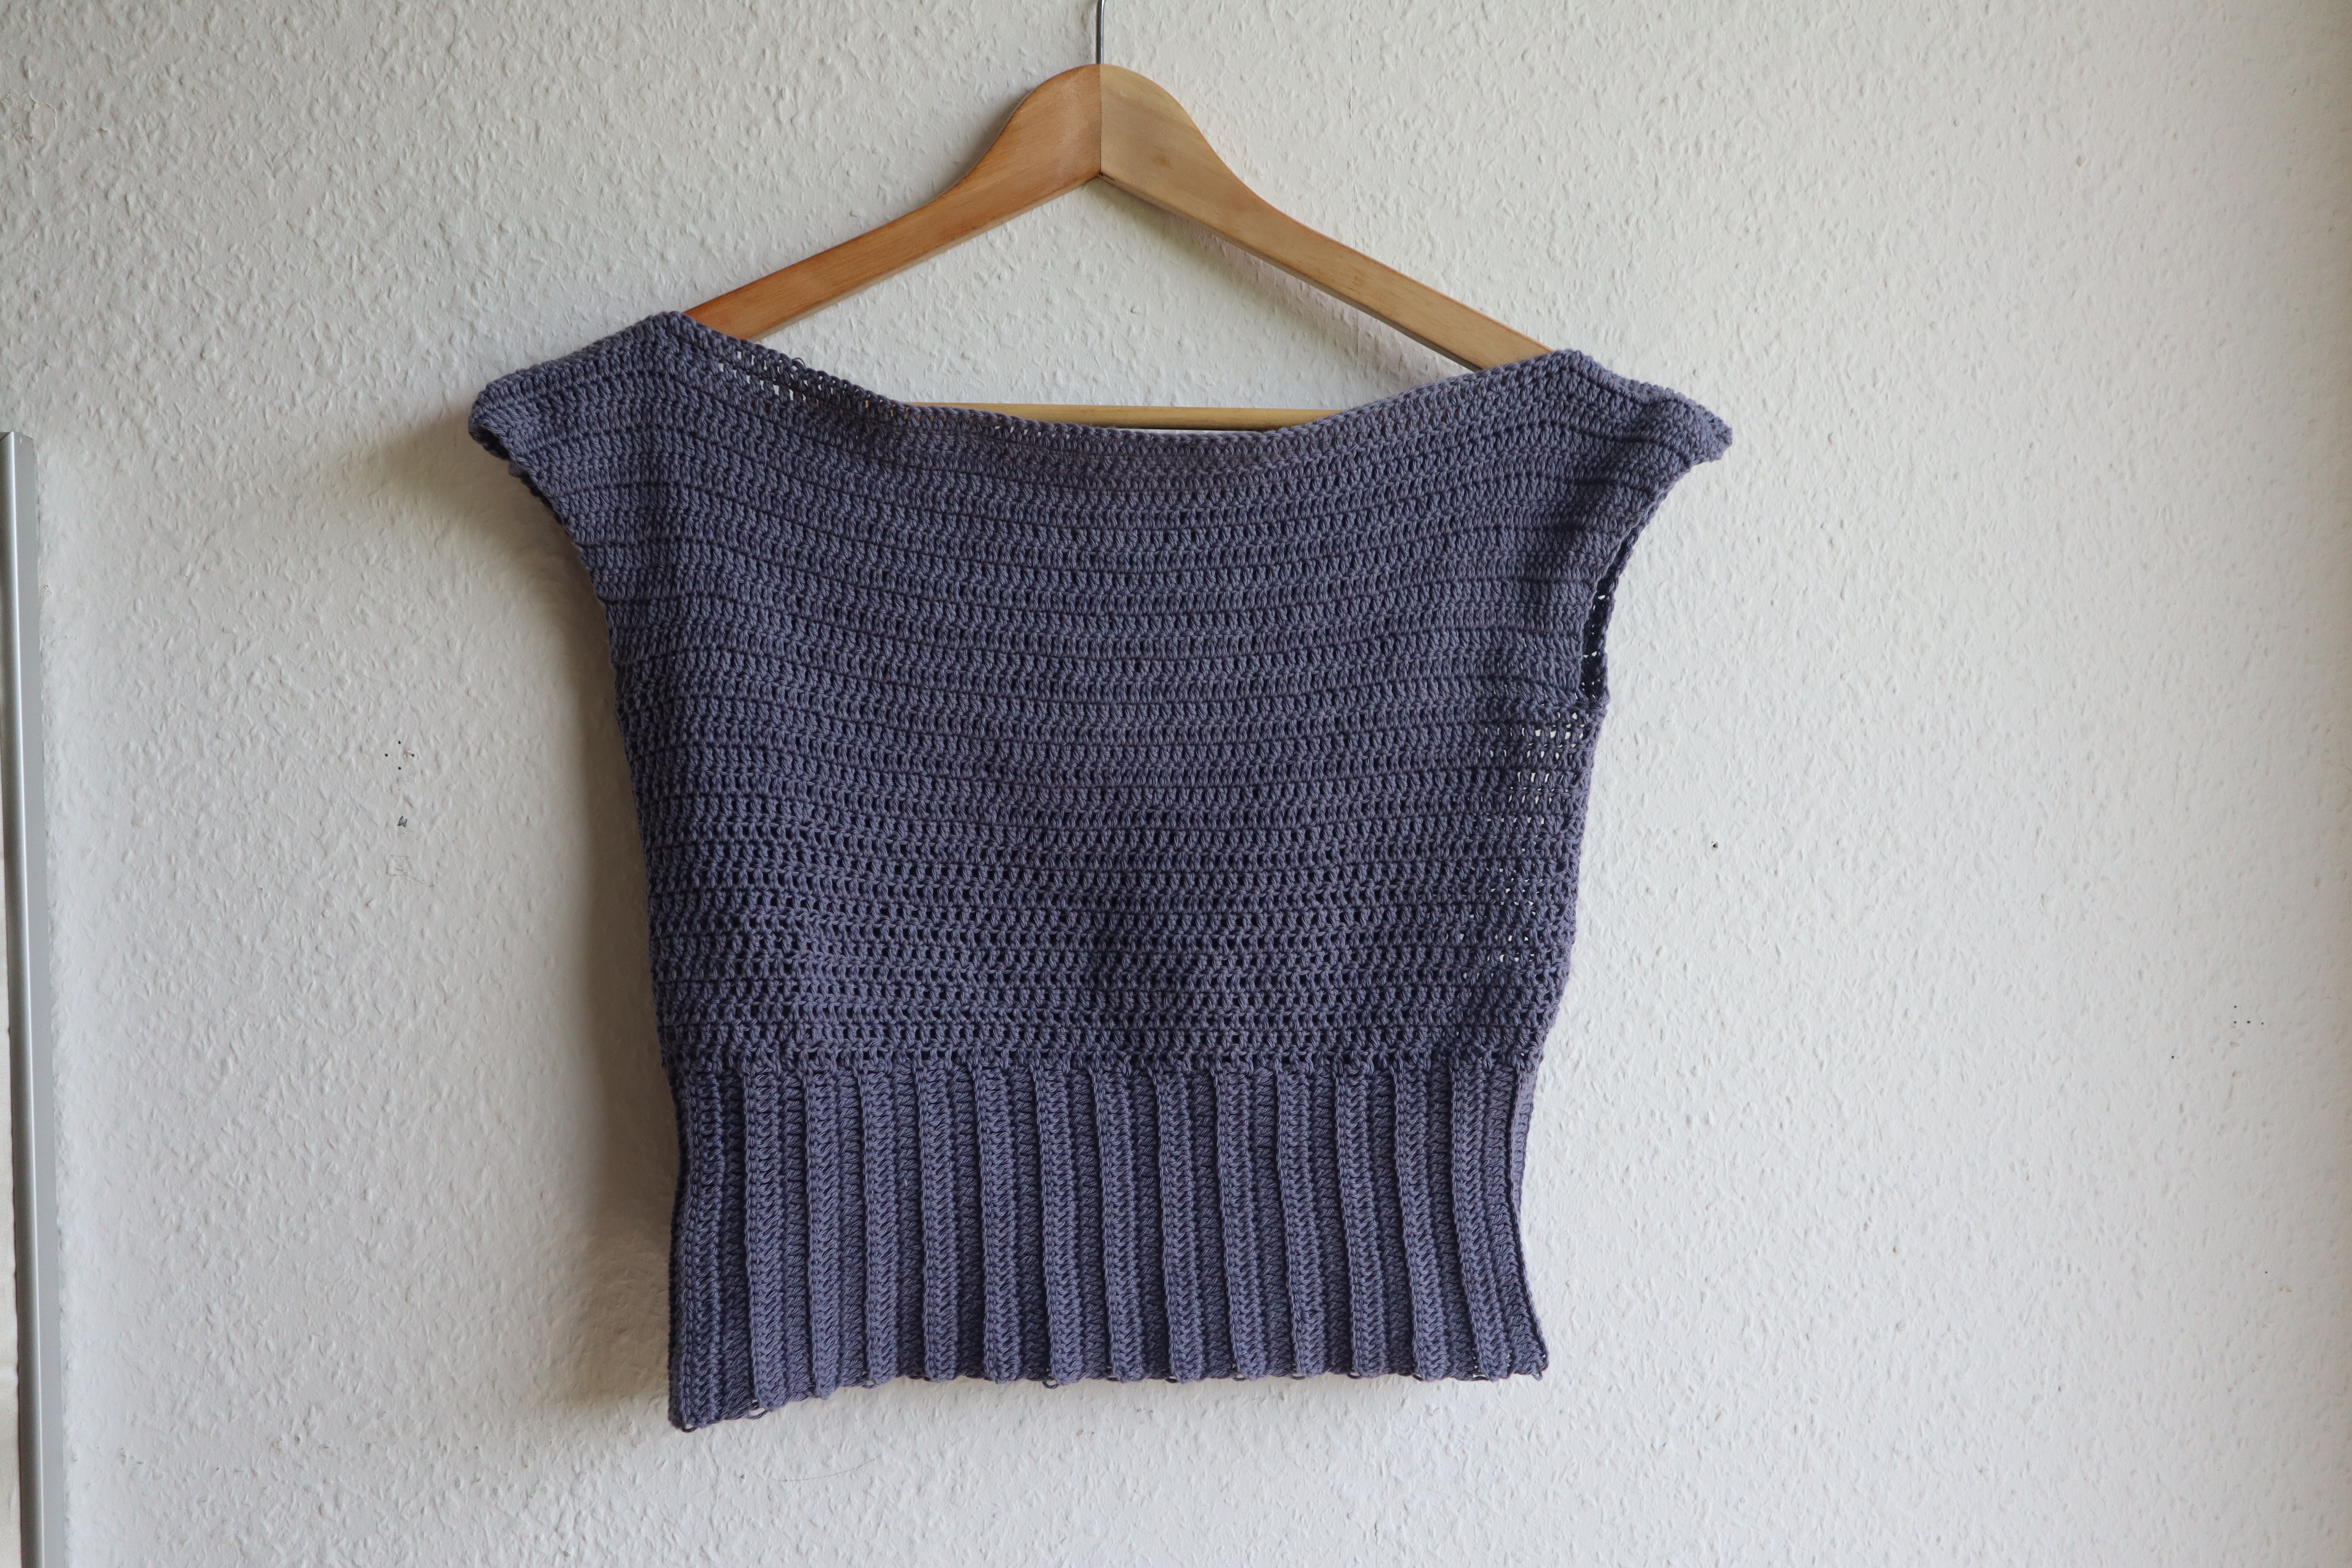
Stitches: Treble crochet, chain 3 at the end of every round (turning chains).
Switch yarn color: By bringing the new color in at the very last stitch of the old color (when you pull the yarn through at the end of the round when you slip stitch into the first stitch on the round). Then chain 3 in the new color (turning chains)
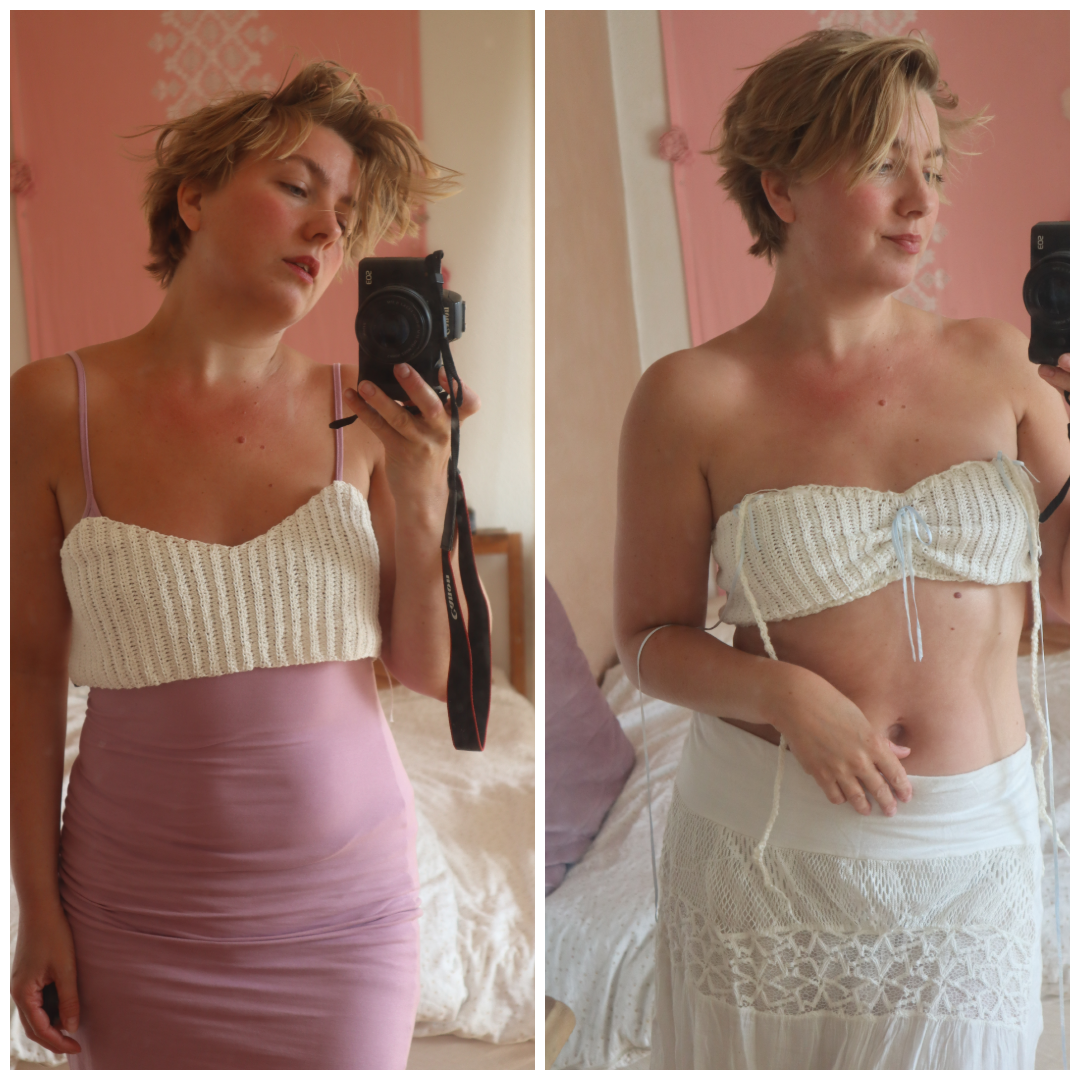
You will also need: A needle to sew in the ends and alternatively some neutral colored (similar to your skin tone) fabric to sew into the top/skirt. I used a rectangle for just the bust and sewed with needle and thread all around the edge and through the crochet dress on the wrong side. You can also wear a slip dress under or neutral colored underwear – or use it as a beach cover up dress.
How to always make stripes look good
I chose beige, two shades of blue, silver (that looks blue when paired with these colors!) and some sparkly yarn that I only crocheted in sc (simply because I didn’t have a lot of it and wanted to save some).
You can just mix the stripes at random and just leave the yarn end at the beginning of the row and pick it up later, as you work in the round. In the end you can just tie knots on the loose yarn and leave them hanging – you can also weave them in if you like, but it’s not necessary. Just make sure that when you do change color, that you make sure the yarn is always on the wrong side of the dress, so you don’t end up with yarn strands on the right side.
I like to always add a neutral color (white or beige or cream) between each color change, but sometimes I have switched it up and made two shades of blue/silver or beige/white after each other – this works best with similar colors, if I was using contrast colors I would have definitely seperated them with a beige color.
I had a shade of blue that I wasn’t a big fan of, so I only added a hdc row with it twice throughout the whole dress and I generally try and switch colors often.


When you have made the skirt part
Try on the skirt – make sure you put it onto the body to see where it sits on you. Is the waist tight to your waist? if not move the skirt down a bit, if it fits your waist well you can continue to crochet rows but now on the other side of your very first row. Insert your hook, chain 3 and start crocheting through the loops on the top of your row.
Crochet until you have the length you need for a dress. If your waist is smaller than the skirt opening, then do decreases – exactly how often and many increases you did, now you just crochet 2 stitches together to one instead of making 2 stitches in the same stitch. Decrease until it fits your waist. Continue with regular rows of no inc/dec (if you are pear shape like me. OR start increasing when you reach the bust. Increase the same as you did on the skirt, try on as you go and make sure you only increase until you have enough width for your bust.
Then do regular rows if needed at the end. Break off the yarn when you have the length you want. Tie knots on the ends inside the dress and weave in the other ends.
The straps
Then do a chainless foundation with single crochet for the straps. Approx. 1/3 of the way into the dress from the side. Make approx. 50 sc stitches in chainless foundation directly out from the dress. Make sure to try it on and put the strap over your shoulder – stretch it! Add or remove stitches if needed. Slip stitch to the opposite side of the dress – lay the dress flat to see where it should go or slip stitch while wearing it. Do the same with the other strap. Weave in the ends.
The lining


Now you can add a neutral colored piece of fabric if you want and hand sew through the edge all around into the inside of the dress. You can also use an old jersey t-shirt and cut it into a tube. Then sew the sides to the sides of the dress and also the top opening into the dress as well, so it stays in place.
I only added a piece for the top part.
Congrats, now you made a super cute every-day striped dress for summer! Make sure to tag @mati_denmark and tag #KeriDress if you share this on social media. s