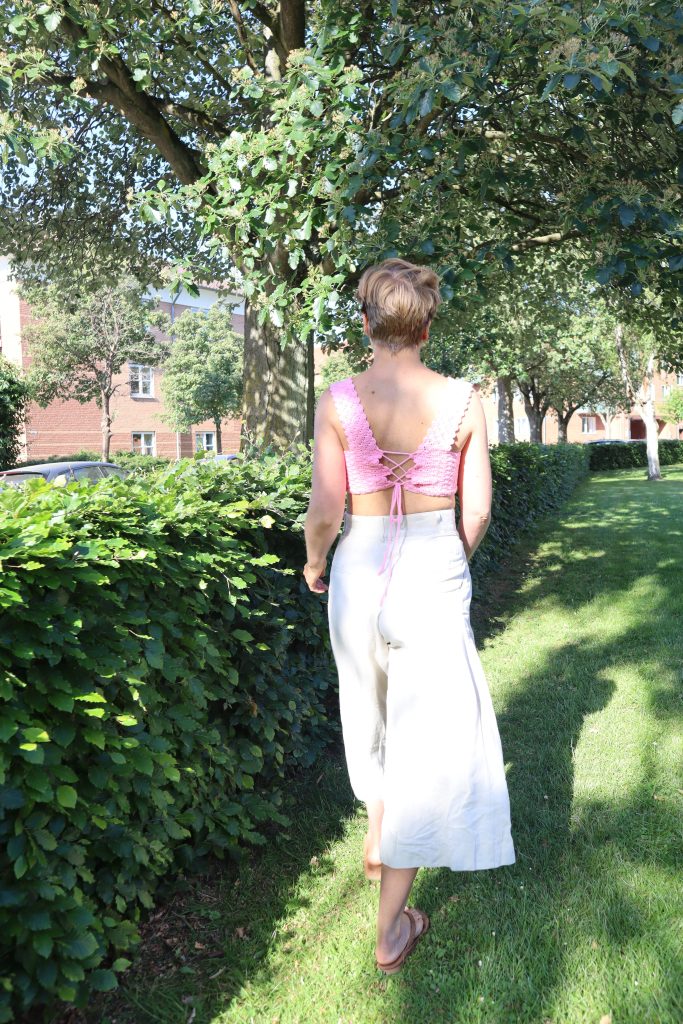
How to crochet chunky shorts with drawstring waist:
Hook: 6 mm Yarn: Size 4/aran/worsted. Find yarn here (affiliate) Stitches: Single crochet in back loop and half double crochet.
Follow the Ellie shorts pattern and use the same measurements as describes. I made mine short – but just make sure the full length is longer than the crotch length.
When doing the decreasing on the crotch and the hips, you are going to decrease less. I decreased about half as many stitches per row than the pattern says. Sometimes I only decrease 1/3.
As the pattern is quite intuitive it won’t matter if you on some rows make less decreases than on others – just as long as front and front have the same stitches when you end the panel (and back and back have the same stitches at the end of the decreasing).
For the waist. You are going to make half double crochet stitches through both loops. I made approximately 1-2 hdc per single crochet row – but just make sure to spread them out so you are not increasing on the waist band.
You do the same as in the pattern, but you don’t insert elastic at the end – just make a small opening inside the waistband so you can insert a waist tie.
Sew the waistband close and then use a safety pin to weave the waist tie into the waistband.
If you are like me, crocheting can turn into a stressful activity and make you get stuck in your head, drifting away from the present moment and out of your body – this can lead to dissociating where you shut down your body and emotions, feel numb, lose track of time and neglect doing other things during the day because crocheting takes up everything.
Dissociating can be good in smaller doses and it is something most people recognise – have you ever read a book and drifted totally away from your life and into this story? But if it happens too much or all the time it can lead to feeling disconnected and losing touch with yourself and even forgetting to breathe. For me not being present when crocheting looks like this:
– Thinking about how the item is gonna look – Forgetting to breathe – Fixating on visualizing putting on the item/ weaving in the last end/making the last stitch – Thinking about where to take photos, what to wear with the item – Crocheting way too fast to reach the goal quicker – Worrying about wheter or not the item will look good/fit – Neglecting other areas like eating, drinking, bathroom breaks, socializing or even personal hygiene.
It’s not that it’s bad to sometimes think or act in this way. Visualizing and having a goal is also important, but when it takes over it can turn crocheting into something toxic and even an addiction.
But often this overwhelms me with all the things that needs to be done to get the item done, I’ll become too fixated on finishing the project rather than being present, being in the Now – and therefore be mindful about the process.
IT’S NOT ENOUGH, SO I RUSH.
My problem is that I get a feeling of urgency, I feel that was is here now is not enough, I think that it will be better once I’m done with the project. And I feel this lingering feeling of not having enough hours in the day, I am behing and time is running out for me, so I rush.
Then today while sitting with my crochet and thinking these thoughts I looked over at my herb table where I have planted seeds in soil. No sprouts are visible. I started to think, that I can focus on watering the soil and giving it enough sunlight – focus on the need of the seeds day by day, or I could get fixated on the future — when the herb table is filled with green herbs. Then I thought, but then you’ll pick the herbs – and then there will be no more herbs left, the soil will be empty again – no seeds and no sprouts and I’ll have to sow again and it all starts over. And I could see how this related to my crocheting and addiction to it and to always being one step ahead, not really enjoying the Now.
UNDERSTANDING THE CAUSE
Being constantly in the future prevents me from living. It tells me that something better is just around the corner. The same phenomenon happens when I go into a PTSD flashback, just the other way around; I feel that danger is lurking around every corner and I can’t be present.
I like to notice why I’m having difficulty being present. Writing this now is an attempt to do just that – be present about why I can’t be present today. Notice what I feel and why I might feel that way.
Often it stems from feeling of mistrust and uncertainty about me and my life, so drifting off into the future becomes an escape into “something better”, where the tasks are done, the kitchen is clean, my hair is washed, my bank account has more money etc.
CAN BE A TRAUMA SYMPTOM
Escaping into the future can be a life saver if you have experienced trauma, this is what saves you, if something bad is happening to you and the pain of being in the moment is worth than dying. Then it’s a relief to drift away in your mind, to avoid experiencing the pain in the present.
Mindfulness and being present can’t be forced. You can’t do anything to become mindful, it’s actually more about not doing.
If you’re doing a lot, racing through your projects, thinking ahead all the time, rushing around and trying to reach the finish line, you’ll continue to race. Because it’s not about the things and the race, it’s because of something happening right now that you are fleeing from. But know, that it’s okay to flee, understanding the “why” is so crucial in both being aware of what is happening and being able to change it.
When I can’t see a clear cause to my stress I notice that it’s just because that’s what my brain has been taught – even though there is no danger in the present. I have been used to driving on a road of fear and stress and it’s what it has known most. I need to create another road aswell, a road of more peace and being, so I have a contrast to the old road.
LEARNING TO TAKE MY TIME Sometimes I just need to put the work away to do (or not do) something else completely. Brew some tea, watch a comedy series, go for a walk, breathe. I think it is also about appreciating what is here and now – even if what is here and now is an unfinished project. Think about maybe sharing your unfinished project and romanticizing the process more than the product.
Today I’m practising to tell myself “There is nothing to do”. Everything that is happening or that “needs to get done” will get done in its own, I can’t force it – well I can, but I won’t like it. I’m enough and I’ve done enough.
And sometimes it’s my fear talking, it’s the fear of not earning enough money to provide for myself, the fear of being forced to do a regular job that will slowly kill me, the fear of being trapped in an enviornement that is not good for me. I sometimes think, that if I can just do and do at 200 km/h, then I can relax for a few days.
No! I can relax and still earn money. Just as the days I’ve been the most productive I don’t sell a single product. And yes it’s uncertain and I don’t know how the future will look, and that’s okay. I can take my time, I have time, I don’t need to rush, I’m enough. I’m really enough.
How to crochet a chunky ribbed top with elastic straps:
Hook: 10 mm (beige top) or 6 mm (grey top) Yarn: Size 8/super bulky/14 ply, wool, 50 g = 50 m (I used 90 grams) Or size 4/aran/worsted, cotton, 50 g = 125 m. Click here or here for the yarn I used (affiliate).
Follow pattern for Etna top but make half as many decreases. For the grey top crochet use single crochet instead.
For the straps: chain 80 (or 10 for the grey top) and crochet hdc slip stitches: Yarn over, hook through chain, yarn over, pull through stitch and all loops. Repeat through the remaining chains.
For elastic back:
For the straps only chain 40 (70 for the grey top). Repeat the hdc slip stitch above.
Cut a piece of 5 mm elastic that measures about 20 cm. Attach to both sides of the top with safety pin. With a 4 mm hook crochet single crochet around the elastic until it covers it. Sew in the elastic. Use this tutorial.
Follow the Holly hat pattern and use single crochet
Use 4 mm hook and 2 strands of superfine/size 1 cotton
When you reach the increases on the brim, only increase half as much as increase randomly. (depending on the stitches you use, you increase either 4, 5 or 6 stitches per round)
When you have the length you want, finish and break off the yarn.
Other tips for Holly hat: – If you want a smooth circle make sure to just increase randomly.
– If you want a pointy edge (to the brim as well), mark every other increase (every other point) that you made on your last increase round that you made before making the actual tube. This way you know when to increase when you start the brim (as the increase is made in the same stitch on each round).
Ja! Du behøver ikke have taget kurser, have erfaring med at drive virksomhed eller have hæklet i adskillige år, for at starte en hæklevirksomhed. Jeg plejer at sige, at hvis jeg kan, så kan du også.
MIN BEGYNDELSE
Da jeg startede, var jeg slet ikke klar over at man kunne tjene penge på at hækle. Jeg husker en af de allerførste opslag jeg lavede på Instagram, hvor en fremmed kvinde skrev og spurgte om hun kunne bestille sådan en top. Langsomt begyndte det at gå op for mig, at det faktisk var muligt at tjene penge på.
Når det kommer til hækling er der også mange forskellige måder at tjene penge på det på. Det afhænger både af hvad du er god til, hvad du kan lide at lave og hvad andre er villige til at betale for.
Sommetider skal du være i gang i lidt tid, for at opdage hvad folk er interesserede i og hvad du er god til og andre gange vil folk kontakte dig direkte og fortælle dig, hvad de vil have.
FIND UD AF HVAD DU KAN, HVAD DU VIL & HVAD ANDRE VIL BETALE FOR
Kan du lide at designe noget som en kunde bestiller dig til? Vil du hellere selv bestemme den kreative proces? Vil du skabe fysiske produkter og sælge dem eller lave produkter på bestilling? Eller vil du lave digitale produkter som fx opskrifter eller kurser?
Når du har fundet ud af det område du ønsker at arbejde i, så skær processen ned til mindre dele – hvad indebærer det – skridt for skridt. Hvilke opgaver kan du lide og er god til? Hvilke opgaver bryder du dig mindre om? Det er vigtigt at forstå dine egne begrænsninger og talenter, så du har overbliuk over det.
Måske vil du samarbejde med andre hæklere, fx designe for dem eller hækle for dem eller skrive deres opskrifter? Hvad er det for et slags arbejde du ønsker at skabe for dig selv? Skriv det hele ned, skriv alle dine ønsker og behov ned, og alt det som afholder dig fra det. Det er okay at bede andre om hjælp også, og det er okay at sige nej til noget, som du ikke vil eller kan finde ud af. Forvent ikke at du skal kunne det hele og kunne lide det hele, vi hara alle styrker og svagheder.
SKÆR NED PÅ UDGIFTER
Hvis du ligesom mig synes, at det allervigtigste er at være selvstændig, så tror jeg også du er villig til at ofre nogle ting for det. For mig har friheden i at have mit eget job, været meget højere end ønsket om at rejse, shoppe meget eller gå i byen. Men hvis det ikke er så vigtigt for dig at blive selvstændig, men du hellere bare vil tjene lidt ved siden af, så kan du sagtens fortsætte din livsstil og stadig tjene lidt ved at hækle på deltid.
Jeg er heldig at jeg ikke kun kan leve meget billigt, men at jeg også skaber produkter, som ikke koster mig særlig meget. Det koster mig ikke penge at lave en opskrift og eksportere den til en pdf-fil. Jeg bruger et gratis skriveprogram og det garn jeg bruger til at lave designs med, det bliver enten til et produkt jeg kan sælge eller bruge eller også piller jeg det op og skaber noget nyt.
SAMARBEJDE MED GARNFORHANDLERE & INFLUENCERE
Hvis du har cirka 1.000 følgere på dine sociale medier, kan det godt betale sig at tage kontakt til en garnforhandler.
Meget af mit garn har jeg også købt i genbrug til en billig penge og ellers har jeg indgået nogle sponsorsamarbejder med garnforhandlere, som har sendt mig gratis garn i modbetaling til at jeg deler billeder med det, jeg har kreeret. Når du sender sådan en mail, så hav fokus på hvad du kan bidrage med. Fortæl hvem og hvor dine følgere er fra, fortæl hvilke slags opslag du har tænkt dig at lave og hvordan de kan forvente at få flere kunder igennem dine opslag.
Du kan også oprette en profil på partner-ads.com. Det er gratis og her kan du ansøge om at bruge reklamelinks på din side. Hvis folk klikker på linket og køber noget igennem det, får du en procentdel af salget.
En sidste god idé er at indgå samarbejder med influencere – afhængig af hvilket slags arbejde du laver, så er det en god idé at finde en influencer med følgere som kunne være potentielle kunder. Hvis du sælger fysiske produkter, så find en influencer der passer din stil. Hvis det er opskrifter du sælger, så find en influencer, som har følgere der også kan lide at hækle.
OVERVEJ OM DU KAN TILBYDE ANDRE PRODUKTER
Det er vigtigt at huske, at du ikke behøver at holde dig til ét område, hvis du også brænder for noget andet. Fx kan du lave e-bøger, kurser, lydoptagelser eller videoer som du kan tage penge for. Tænk over hvad du er god til og hvad du kan bidrage med og samtidig hvad andre er interesserede i at betale for. Husk at værdsætte din egen viden og input – du er og kan noget specielt og det er penge værd.
Det kan også være du vil noget helt andet – fx lave en hækleworkshop eller være mentor for andre hæklere.
HVORDAN TJENER JEG PENGE?
I starten, da jeg ikke kunne leve af det endnu, tjente jeg penge på at hækle toppe på bestilling. Da jeg stadig var ret ukendt, kunne jeg ikke få en særlig fair pris for mine produkter og jeg måtte gentagne gange lave opslag omkring produktionen, for at minde folk om at det tager tid at producere håndlavet tøj. Entop der tog mig 6-7 timer at hækle (uden pauser), fik jeg 400 kr for. Så var der også levering oveni og prisen for garnet. Det kunne ikke betale sig i længden.
Min plan var egentlig at fortsætte med det, fordi jeg ikke var interesseret i at skrive opskrifter. Men med tiden så jeg, at der var færre der bestilte og flere der eftersprugte opskrifter, så derfor besluttede jeg mig for at skabe opskrifter, selvom jeg faktisk ikke brød mig om at skulle det – med tiden begyndte jeg ikke kun at kunne lide det men også opdage, at jeg var rigtig god til det.
FINDE BALANCEN
Alt hvad du laver i din virksomhed, kan ikke være lige sjovt. Noget kan du være rigtig god til, men ikke synes er særlig sjovt. Noget andet kan du synes er rigtigt sjovt, men er ikke særlig god til. Det er meget naturligt, at vores styrker og svagheder ligger forskellige steder. Det er også okay, at bede andre om hjælp og det er også okay at lave noget som du ikke synes er ligeså sjovt som det andet og det er også okay at sige nej til at lave noget!
Find ud af, om det er det værd. Hvis du kan tjene penge på at lave noget, som er nemt for dig eller som du er god til, så betyder det måske ikke så meget om du synes det altid er lige sjovt – hvis du tilgengæld får noget igen!
Hvis du decideret ikke kan udstå noget, er det måske en god idé at lægge fokus et andet sted.
TIL SIDST
For at kunne leve af at hækle, er det vigtigt at finde en balance mellem det du kan, det du kan lide og det andre vil betale for. Det er vigtigt, at hvis en opgave føles overvældende for dig, så husk at sæt en grænse. Sig ikke bare ja, fordi nogen er villig til at betale dig for det.
Og husk, at bliv ved med at mød dig selv i det, du kan lide – giv dig selv lang snor – både til at udforske de ting du kan lide, men også at prøve nye ting af. Samtidig, mød andre med et åbent sind, lyt til deres feedback, deres ønsker, deres idéer – hvem ved, måske vil du blive overrasket!
–
Husk at du altid er velkommen til at skrive til mig, hvis du har brug for hjælp på din hæklerejse. Du kan også finde min e-bog der beskriver mere i detaljer, hvordan du kan skabe dit eget job. Læs den her.
Du kan også læse mere om min rejse fra arbejdsløs på kontanthjælp med ptsd, kronisk angst og stress til selvstændig i min egen virksomhed lige her.
Hook: 4 mm Yarn: Jute and white cotton/linen blend in size 3 or 4. Stitches (US terms): dc = double crochet sc = single crochet ss = slip stitch ch = chain
Start with jute. Row 1: Make a chainless foundation with dc until you have 30 stitches, ch 2 and turn over.
Row 2: Make 5 dc in the first stitch, 1 sc in the 5th stitch, 5 dc in the next stitch, 1 sc in the 5th stitch. Finish with 1 sc in the last stitch, ch 2 and turn over.
Row 3: 5 dc in the first stitch, 1 sc in the 3rd dc (the middle of the shell). Repeat, finish with 1 sc in the 3rd dc of the last shell, ch 2 and turn.
Row 4-5: Repeat row 3.
Change to the white cotton/linen blend.
Row 6: Every stitch on the row counts as one dc. Start by making 3 decreased dc stitches yb crocheting two stitches together to one, make 1 dc in every stitch until you have 6 stitches left. Make 3 decreased dc stitches, ch 2 and turn over.
Row 7: Make 1 dc in every stitch, ch 2 and turn over.
Row 8-10: Change back to jute. Repeat what you did from row 2. Break off the yarn.
Make one more panel but make row 1 with the white yarn. Make 1 row with dc in jute and continue from “Row 2”.
Now ss the three sides of the bag together.
Strap: Change to white yarn. Chain 60. Make 1 ss into the opposite side of the back. Chain 1. Make 80 sc around the chains and finish with 1 ss where you started. Chain 1. Single crochet over the edge of the bag and behind the straps. Finish with 1 slip stitch in the first stitch and break off the yarn.
The pattern and finished product is for private use. Remember to tag @mati_denmark in your posts! . Pattern may not be sold or distributed. Product made with the pattern may also not be sold.
Hi my name is Matilde and I’m the owner of Mati Denmark – Denmark’s first business with crochet clothes in focus. Read this post if you want to learn how to crochet.
If you are able to, you can donate small or big amounts to say thanks for the pattern, this way I can continue to share free patterns:
If you are a crochet beginner then look no further, cause here I’ll show you my tips and tricks, so you can learn how to crochet your own clothes. Let’s go!
My goal is both to innovate and simplify crochet patterns, techniques and crochet clothing designs in general.
1. Pick a hook that you like
Go looking in your local supermarket or yarn shop and feel for a hook that is comfortable in your hand. You determine the size of the hook by looking for the “mm” – the higher the number the bigger the hook. For starters choose a hook that is 3 mm or bigger.
You can try one with a simple handle (6 mm) or one with an even more advanced handle (4 mm) for ultimate comfort. No matter which you choose it’s important you find it comfortable or like to hold it.
When it comes to yarn try to look for cotton and avoid wool as it will be more difficult to unravel or yarn with many threads as it can get stuck in the hook. I recommend yarn that is woven like thisor if you want some thinner yarn, this one is great for both garments and cloths.
On the yarn label it will show you what size hook is recommended – it will also say so on the website. Bare in mind you will almost always be able to use a smaller or bigger hook than recommened on the label. But this is just a good indicator to make sure the crocheting is as easy as possible.
On this page you can read more about my favourite yarns.
3. Start practising
In the next sections you will learn to crochet basic crochet techniques, learn my favourite unique stitches and learn different techniques that you can use for your crochet projects:
How to crochet the basic stitches:
When you have your materials ready it’s time to get started with crocheting!
Start by practising the smallest stitches first. Here is how to crochet CHAINS (ch)
With chains you will have a foundation for whatever stitch you want to make.
Here are the stitches and their abbreviations in order of how big they are (= how they difficult they are). These are US terms:
If you know these basic stitches you will be able to make many of my patterns.
Learn crochet stitches
Learn how to crochet CHAINLESS FOUNDATION
If you want to make garments it’s good to know chainless foundation. Chainless foundation acts as the first row or round on your project. In this playlist I show you how to make chainless foundation with three different stitches.
Other good things to learn:
crochet in a circle (for making circle shapes for either garments or animals)
add new yarn to your project (either by tying yarn ends together or pulling the new yarn through the stitch)
decrease and increase (meaning to either remove or add stitches to create a specific shape)
crocheting out from your existing crochet (this is if you want to add something extra to your project)
CROCHET STITCHES
Learn how to crochet unique stitches for your next crochet pattern. you can use these if you are thinking of designing your own crochet pattern. These are some of my personal favourite and there is a lot of stitches that I have invented myself, this will give your crochet project or crochet clothes a unique look.
ROUND MESH STITCH
Learn how to crochet this unique stitch I came up with that consists of circles and looks like tentacles.
123 TEXTURED STITCH
Learn how to crochet this textured stitch that I came up with, which is very meditative.
Learn how to crochet an old viking stitch as a cord:
LOOP STITCH
Learn how to crochet the loop stitch as seen on the Freya jacket. You can also cut and brush it (like I show in the video) and get a faux fur look which is both plastic free and vegan as you will be using cotton yarn.
Here’s how to crochet a 70’s crochet stitch with beautiful and unique texture. This is a stitch I learned from a Danish vintage crochet book from the late 70‘s.
I don’t think you need to start out with a basic square – but if you’re just interested in making household items this is a good start. You could also try out my free pattern for a crochet handbag – this is basically just a square but more fun than a kitchen cloth.
If you are more into making garments you need to pick a simple garment to start out with. Preferably one with no increases or decreases or one that is either just 1 panel worked in rows (like a backless top) or one with a video or video tutorial that comes along.
Crochet top patterns for beginners
Here are some crochet beginner patterns I recommend.
Stella top: You need: chainless foundations, chains, sip stitch, single, half double and double crochet & decrease stitches. Pattern comes with video tutorial.
Elsa top: You need: chains, double crochet, slip stitch, single crochet and here are no decreases/increases. Pattern comes with video tutorial.
Buy crochet pattern here >> Aurelia top: You need: chainless foundation, half double crochet, chains, slip stitch & here are no decreases/increases. Pattern comes with video tutorial.
Learn crochet techniques for your next project:
In the following video tutorials you can learn how to crochet (or add to your crochet) with a numerous of different techniques and stitches. Let your imagination run wild and find inspiration for an exisiting pattern, let them help you understand how to make clothes and find ways to make your own crochet pattern.
Elastic thread is super fun to work with. I use it in my crochet rows to add this ruched effect – the same way you would add it to a sewed item, but here you just manually insert it and crochet around it. I also sometimes just use it in one area of the row to make one area more tight.
Have you ever tried adding elastic bands to your crochet? You can add it to the edge, all around or just one area where you want to tighten the crochet or make it stretchy. You can even add it into your crochet straps, see below.
With this crochet dress pattern you learn how to crochet a romantic dress with elastic thread in the waist and thin elastic band in the edge of the top for a comfortable and ruched effect.
Another use of this elastic is to create ruffles in both edge and straps. Kind of like how a scrunchie works. This both creates a ruched effect on the bra cups as well as making the dress more comfortable.
Here’s an example of a crochet top with long sleeves and rib, where I only inserted elastic in one area of the sleeve – the top edge – this way it holds the sleeve in place plus makes it a more comfortable crochet blouse top wear.
How to make a beaded pendant for your bag or crochet clothes:
FLOWER EMBROIDERY
Learn how to make simple flowers on your crochet clothes with this embroidery tutorial:
GRANNY RECTANGLE
I didn’t know what to call this because technically it is not a granny square, but a rectangle. I use it for Althea top but you can use it for a number of different things. How about making them in a big version and using it for a jute bag? Try thisfree crochet pattern for a granny rectangle bag.
BEADED CROCHET
Check out this video tutorial and learn how to crochet with beads. With this tutorial I teach you how to add beads to your crochet clothes. I have added beads to my Florence top, but you can add it to any crochet project where you are working in rows or rounds.
CONNECTING PANELS
How to crochet on the side of the row and how to connect crochet panels with your crochet. This is instead of sewing – the good thing about this is that you can easily unravel if needed whereas sewing is harder to undo without wasting yarn.
SPAGHETTI STRAPS
To fulfil the Y2K and 90’s crochet look you will need spaghetti straps. They are simple and elegant and so easy to crochet:
FLOWER EMBROIDERY
If you want to make your crochet clothes even more unique why not add this flower and leaf embroidery? It is actually quite simple. Get the free crochet tutorial here:
BRA CUPS
This is the tutorial I use for many of my designs with bra cups. Learn how to crochet a bra cup in any size:
Check out this video tutorial and learn how to sew labels on your crochet clothes:
FELTET CROCHET
Maybe you have crocheted a sweater and want to shrink it or learn how to make it more sturdy. Then try out this felting tutorial:
5. Understanding construction
Depending on what kind of project you want to make there will be different kinds of constructions. This can be working in rows, rounds or in a circle. Backless tops will be in rows. Garments that go all around the body – like regular tops, sweaters or dresses can be made both in rounds or in rows (individual panels that are put together in the end). Then there are things like shapes and calculating increase and decrease to get a specific angle to the specific area of your project.
To learn this in a very simple way I have created a crochet course.
Check out my beginner’s video course on construction here.
6. Taking measurements
Most of my recent patterns follows measurements. And even if they don’t it’s always good to have an idea of what your body measures so you are able to figure out what size you are closest to. This video will show you how and where to measure.
Here’s how you can sew in you yarn ends once you’re done with your crochet project:
More crochet tips and tricks:
Take your time
… and have patience. Learning anything new takes time. But just spending 10 minutes everyday on doing some stitches or working on a project can really go a long way. It’s okay to make mistakes or to finish a project that didn’t turn out how you planned – that’s part of crocheting even when you’ve done it for years or are doing it professionally. Be kind to yourself – it’s about the journey not the destination.
Remember that you are always welcome to contact me if you need any more help in your crochet journey.
Learn how to crochet beautiful, simple and romantic clothes for women and girls
Here you’ll find all crochet patterns for crochet clothes and crochet accessories. Learn to crochet clothes for girls and women, such as dresses, bags, crochet sweaters, pants, shorts and skirts. Always make sure to measure the first row or round against your body – and stretch it – as the measurements and calculations given are only suggestions. Explore the many timeless crochet designs made for simple people who want beautiful crochet clothes for everyday and party. Whether you are a seasoned crocheter or completely new, there are crochet patterns for you. So look around, get inspired and find your own self-love and confidence while crocheting something beautiful for yourself.
Crochet patterns for crochet tops and vests
Here you will find crochet tops – both a simple crochet strap top, a crochet top with a cowl neckline or a crochet vest. You will find both sleeveless crochet tops, crochet long-sleeved blouses and if you look under crochet sweaters you will also find crochet summer sweaters that can easily be used as a long-sleeved top.
Patterns for crocheted skirts and dresses
In this crochet category you will find, for example, a crochet wrap dress, a crochet bodycon dress, a crochet rock romantic dress or, for example, a crochet tunic for the beach or to wear over jeans. You will also find crochet skirts – both a pattern for a crochet beach skirt with unique crochet stitches, a tight-fitting crochet skirt in a rib pattern (crochet that looks like knitting) as well as a crochet mini skirt with elastic at the waist and a slit in the side.
Patterns for crocheted sweaters, jackets and cardigans
Here are both crocheted sweaters for summer and winter, crocheted striped sweaters (if you want to crochet a sweater in scrap yarn, for example), a crocheted chunky sweater that resembles a chunky knit, and light, crocheted sweaters with a lace pattern.
Crochet accessory patterns
Crochet accessories, for example, crochet for the home such as crochet dishcloths and crochet tea towels, a crochet plant hanger, learn to crochet a jute scrubber for cleaning in the home, a crochet net that can handle a lot of weight or a crochet tote bag or crochet task for the beach or city trip. You will also find a crochet pattern for a crochet hat – both with a wide brim and a crocheted bully hat. Learn to crochet socks in a super simple way and learn to crochet a mini scarf or, for example, a crocheted rose or crocheted earrings that look like leaves and flowers.
Patterns for crocheted shorts and pants
Whether you like crochet that looks like knitwear in the form of a pair of ribbed crochet shorts with an elastic waist, or a more romantic style such as crochet shorts with embroidered flowers, crochet biker shorts or crochet pants with a seashell pattern, there is something for you. With these simple crochet patterns you can learn how to crochet pants and shorts in any style and size.
Most of my patterns are suitable for size XS and above. Making childrens version can be possible with some, but most is suited for adult women and girls. Some patterns are also only available in one size.
5 important steps to remember:
take your first measurement
crochet until you have that measurement
measure the crochet on your body and stretch it
crochet more or less stitches or rows if needed
measure on your body along the way
Measurements & Calculations
An important reminder when you follow my intuitive patterns:
The calculations given to you in the section “Your measurements” is a guide and not a must.
Your yarn type, hook, tension and body shape will affect the outcome.
Always put the crochet up to your body
Therefore, after measuring your first row/round ALWAYS put it around/against your body and try on the item along the way. This gives you the most precise result.
Sometimes a pattern may say: waist measurement – 52 cm (waist minus 52 cm).
If this calculation don’t fit with how your row fits around your waist, don’t worry about it. Trying it on your body will most often give the best results anyways. Just make sure to stretch the row/round slightly (depending on how tight/lose you want the end result to be)
If you are new:
read the first 1-2 pages from start to finish – this will tell you all you need in terms of materials, stitches, the process and measurements
take your measurements – use my video as a guide to help you – and write them down
do one step at a time (instead of reading through the whole pattern, as that can be too much at a time)
if you are unsure about anything go back to “Process” section or if there is a video/photo look at that as a help
If you are intermediate/advanced:
you might not have to read everything to begin with – maybe you already know the stitch abbreviations
look at the materials used
take your measurements – write them down
go to the actual pattern (if you need further instructions read the “Process” section.)
Let’s rewind to October 2018. I had been studying to become a social and health care assistant for 2 months and had tried to balance a normal life as a student while dealing with PTSD – meaning being in constant high alert.
I was exhausted all the time from never being able to relax. One day felt like a week and I knew that if I had to continue studying I would also have to do intern work full time for 1,5 years and I just realised that I couldn’t take 3,5 years of that.
MY PTSD-SYMPTOMS
Being in constant high alert for me meant having a racing heart, being hypervigilant – always being aware of my surroundings, being hyper sensitive to other people’s actions, words, facial expressions, tone of voice and body language, sweating and blushing if someone just approached me, feeling a sense of doom around every corner – that something would give me a huge shock which would send me over the edge. It felt like having a gun pointed to my head all the time, not being able to breathe freely or relax, feeling in constant danger.
At the same time I had flashbacks every day. Often a teacher would forget about me and I was sent right back into childhood and felt so shameful, that the whole world hated me and I was unlovable which made me feel more unsafe.
At the same time it was like I had another life on the side (crocheting and selling crochet tops), that was more interesting, fun and filled with freedom – but a life that I thought to myself would always be an illusion, something unattainable and unimaginable for me.
TRYING TO FIT IN
I thought that I would have to live a normal life – work a full time job somewhere so I could provide for my children, go traveling, buy a house etc. Then I realised I actually didn’t want children, that I was happy about living in my tiny apartment and not owning my own place and didn’t feel a need to go traveling.
I just wanted to feel safe and I was happy by the thought of just earning enough to get by and feel relaxed. But it felt like my small expectations of freedom and relaxation were still not possible.
Even working 10-15 hours a week would still mean I had to be in constant stress to earn money to pay my bills. Just the thought of earning money was so stressful to me.
BEING GASLIGHTED BY THE SYSTEM
During the next 10 months – from October 2018 to August 2019 I was unemployed.
I was broken down, but I still had to fight the battle alone – the battle of authorities not taking my mental health serious and just wanting to get me through the system as fast as possible – into any job (even if that would mean I would then break down again and get back into the system again). It felt like screaming into an empty corridor only hearing my own voice echo back. No response, no empathy, no belief in me.
I had heard of so many people experiencing the exact same thing as me. If you didn’t look depressed, anxious or suicidal then you were not.
Imagine how traumatic this is when you have been dealing with being gaslighted your whole life and then the authorities that were suppossed to help you just continue the gaslighting.
BEING IN THE SYSTEM WORSENED MY PTSD
In the end just stepping into the job center to have my weekly meeting with a social worker I would sit with the hands over my head and my thumbs pressed into my ears to block out any sound or light.
I learned to be completely inside myself, because I knew that no matter how much I tried no one believed my symptoms were serious and that I needed their help. I had to change to become a person without PTSD, instead of them helping me find a place to work where my PTSD wouldn’t get so triggered.
I couldn’t imagine a life in freedom but I also couldn’t imagine a life in panic.
I WOULD RATHER BE POOR, IF IN RETURN I CAN BE FREE
So what drove me into self-employment?
It was the unbearable thought of living a life in fear and stress, controlled by authorities who didn’t care about my well-being. I would much rather not be able to pay my bills or not get food on the table, and then at least have my freedom, be my own authority.
I had to actually think: “what is the worst thing that could happen?” . The answer: “homelessness and starving”. And that sounded more appealing to me than being in a state of panic and hypervigilance.
The physical stuff didn’t scare me as much as everything I had already experienced.
Quitting welfare and going full time as a crochet designer was one of the easiest things I had done in my life, because everything else seemed even more impossible.
Choosing a life of self-employment and freedom was uncertain and something I had never done before – so at least I had to try it to see if it was possible, because I knew that a life in fear and stress would eventually kill me.
I had no other option left, there was no way back.
GETTING OUT OF THE SYSTEM FOR THE LAST TIME
In my last phone call with my social worker I laughed ironically while I told him “I might just move into a tent and create my own job” (though I didn’t actually mean or believe it).
So I quit welfare the 1st of August 2019 and somehow I knew that this would be the last time I would be in the system.
I was relieved but afraid because I didn’t believe that I would be able to earn enough money from crochet to make a living off it.
I had lived with as little as possible the past months so I had a little bit of money saved up that I could live off and I still had my part time job as a blind assistant but I usually only worked 2-5 hours a month. Though having a safety net helped the fear a lot.
ADJUSTING TO A LIFE OF FREEDOM
The first many months in freedom I still woke up every morning in panic (as I had done every day for the past many years) because I thought I had to be somewhere where I would be in constant high alert and fighting to be understood. I still couldn’t understand I was free of it.
All that time (in the system, in jobs, in school, in relationships) where I had worsened my PTSD and given me another layer of trauma to deal with.
I was finally free and there was a a great deal of relaxation but my brain and body was still reacting like I was a captive in my own life.
LIVING CHEAPLY
I started dumpster diving for food and I cut down all my expenses – no wifi, no streaming services, no money for any kind of unnecessary things. I only spent money on food and bills.
Six months went by and I had earned about 1/4 less than over the Summer, which meant if I put it all together I would have enough to pay my bills and food for maybe 1 month. So I was getting a little frightened and it was winter so not a lot of demand on Summer clothes either.
LEARNING TO MAKE & SELL PATTERNS
Gradually I started getting demands on the patterns for my designs so I started looking up crochet patterns online to see how the layout was and how they were written. And I tried to freestyle my way through it. I thought to myself: “How would I want to read a pattern?”. So basically I wrote a pattern for myself that I would then create a listing for on Etsy.
I upgraded my website subscription so I could start selling phsyical and digital items there as well. Suddenly I got a holiday pay that was bigger than I had expected and my friend out of the blue gave me money because her holiday pay was a lot bigger than mine.
I started having more and more money on my account and realised I wasn’t using my savings anymore. I suddenly had more more money than I needed to get by.
As the patterns started to sell more and more and my website got more and more visitors I started to feel that this might actually be possible. In August 2020 I officially became a registrered business – I had applied the year before but I closed it again immediately because I didn’t believe it would work out.
TODAY
The past 10 monts I have earned more than any other job I have ever had.
It’s hard to understand and I pinch myself everyday. I don’t wake up with a panic attack (unless I have had bad night). I feel relaxed throughout my day, even though I still struggle with PTSD, anxiety, depression and shame.
I am living the life I couldn’t even imagine – a life of freedom, relaxation, empathy and joy. With time and space for my healing process. Where I can respect my own boundaries, be my own authority, not minimise my symptoms and share what I learned with all of you.
When I look back at just 6 months ago I believe much more in myself and my abilities. I very rarely have the thought that “This won’t work out”, which I had everyday when I first started out.
It’s not just because it’s actually going well (because even though it’s going well I can still have doubts and fear for the future — will it last?), it’s more because I am actually living a life more in harmony with my values, needs and wants.
I am giving myself the life I deserve and seeing how it’s making me more and more comfortable in myself and in my life is giving me a greater sense of trust and belief in myself and the world.
I don’t have the same obsession about the future and wheter or not I will continue to do this kind of work or not. I try and focus on the here-and-now and do the things I enjoy doing on this particular day. If at some point I want to do other things, like work as a chef, open a café, work therapeutically with other people, be a mentor or musician I have trust.
Because if I could do the unimaginable, I can do anything!
I feel extremely proud of myself and where I have come and so grateful for everyone of you who has been there by my side during this whole process. Those who have bought my digital or physical products, tagged me, sent me photos, reposted/liked/commented/read my posts and written to me and shared your own story.
Thank you for believing in me when I didn’t.
A FINISHING THOUGHT
I don’t believe the saying “believe in your dreams and they will come true”. Yes, our thoughts have impact but what if we don’t believe? Can we only start living once we start to believe? The other day in a feeling of hopelessness I was reminded that:
Just because you lose all hope, doesn’t mean that no good will come to you.
What if believing in ourselves comes from the process and experience of listening, being aware and showing ourselves patience and comfort even when we don’t believe?
So if you doubt yourself, don’t feel good enough, don’t feel ready, don’t have a support system, have been hurt too much in the past, fear that it will only go downhill – it’s okay.
Your life doesn’t require you to be fearless. Your life doesn’t require you to believe, imagine or visualize something for it to become a reality.
Start now – do what makes you happy, enjoy your passion, take your time, go in your own pace. Wanting something and going after it is enough for it to come true!
And if all else fails, just know: I believe in you. There is a way, a place for you too.